PROBILT French Door Installation Instructions Steel or Wood
Caution: please remember to always transport and store the PROBILT door system in an upright position and to keep it dry until it is correctly installed and weather protected. Failure to follow proper installation instructions and/or failure to finish the unit promptly before exposure to weather will void warranty.
Installing your new PROBILT French door will take time and careful attention. There are no shortcuts. Follow these instructions carefully and you will have a beautiful French door that will give you years of trouble free service.
Tool List:
hammer
screwdriver
all-purpose caulk
plumb-bob
rule or measure
level
square
drill
countersink
nails
marking pen
shims
finish coat and brush for its application
Attached to your door should be 2 packets with screws and plastic screw caps you will need during installation.
Step 1
The Opening:
Using your level, and your square, see how level and square the rough opening is.
For example, the top or head and side walls of the rough opening may not be square, or perpendicular to each other. Or the rough opening might be in parallelogram shape. Still another condition to look for in your rough opening is twist. Making correct adjustments on our door unit as it is installed can compensate for all of these common problems.
Remember your door must be installed level, square, and plumb within the rough wall opening to operate as it was designed.
Step 2
Getting the Door Ready:
Remove the skid board from beneath the sill or your door, sometimes this is two pieces of board, sometimes one. In some cases there will not be a skid board at all. The clips on the doors that have held the doors closed during shipping must also be removed.
Run three 1/4" lines of all-purpose caulking compound along the full width of the bottom of the rough opening or sub-floor. Set your door unit in the rough, pushing in both bottom corners and sides until the exterior trim of the door unit is flush against the outside wall.
Measuring the Fit:
While someone holds the door keeping the exterior trim snug against the exterior wall, take your long level and check to make sure the bottom is still level, and that the head jamb of the unit is level. Next, go inside and check the amount of space between the door and the jamb. Move the unit to allow the margins to become more even between the door and the jamb.
Returning to the exterior side of the unit. Secure the unit by driving two 2 1/2" finish nails, one into each upper corner trough the exterior trim and into the wall. Leave about 1/2" of the nail out.
With the door temporarily held in place, push open the doors and see how they operate. If there is any sticking or binding, or if they swing shut or open by themselves, your door is not hanging level, square and plumb and adjustments are needed to make it operate properly.
If the doors are sticking or won�t close properly, return to the interior side of your door. Look for areas where there is too much space, and areas where there is too little space. Shift the door one way or the other to even up; the margins around the door and insert shims to hold the door unit in position.
Push or pull the bottom of your door until the door is level vertically and square or perpendicular to its own unit head jamb.
Check the lockset holes to see that they are aligned. When everything checks out level, square, and plumb, and your door is operating smoothly, place shims behind each hinge to fill the margin of space between the door unit jamb and the rough opening. and across the top of the head jamb at three equally spaced areas.
Step 4
Securing the Door:
Secure your door unit permanently into the rough opening by driving 2 1/2" nails through the jambs and shims where you have inserted them, securing them to the studs of the rough opening.
Drive nails flush and set them 1/8" deep with your countersink or nail set for finishing.
Remove two screws from the top hinge on each side jamb of the door unit and replace with the long wood screws provided. These will extend through the door unit side jamb and into the wall studs of the opening. Pay special attention when shimming. Your shims must fill up the void behind the jamb to create a solid nailing surface. If you fail to shim properly and leave open space, the door unit will be pulled toward the rough opening.
Adjustable threshold may be adjusted as necessary. Upward only.
There are bolts both at the top and bottom of your stationary door. Check where these bolts touch the head jamb and the bottom sill and mark it with your marker. Drill 3/8" holes at these spots and apply the metal plates provided .
Caulk along the sides and top of your door where the exterior trim rests against the house. Make sure there�s a tight seal to prevent water entering the wall cavity between the door unit and the rough opening.
Now is the time to install your standard lockset following those directions.
French Door, wood door, galvanized door, fiberglass door, and storm door.
french door
French door
French door
pet door
French Door, wood door, galvanized door, fiberglass door, and storm door.
French Door, wood door, galvanized door, fiberglass door, and storm door.
french
door french
door French
door French
door French
door French
door pet
door pet door


|
|
Prime Doors
When selecting a french door for your home, you
need security, durability, and a weather tight fit. Only the strongest
and most energy efficient materials are used in our doors to give
you an attractive barrier against the harsh external elements. All
of our doors come primed and ready to be painted any color to match
your home.
- Energy efficient: Its unique sill design and magnetic weather stripping provide a tight seal to increase the level of comfort in your home and help you control your utility costs.
- Reliable protection: Our french doors' wraparound strike
plate and dead bolt locking system improves the security of your
home.
- Durable and long lasting: Made of galvanized steel or
fiberglass, our prime french doors prevent rust and corrosion
to give your home the lasting beauty it deserves.
Available in Steel, French, Fiberglass, or Slider Models.
Storm Doors
Storm doors help you increase the energy efficiency of your home and allow you to enjoy the outdoors from the inside of your home. Professionally installed by our qualified installation team, every door is custom made to fit your home and backed by warranty.
- Virtually maintenance-free: Made of 6063 T5 aluminum alloy and electrostatically applied paint, our storm doors will never rust, rot, chip, or peel.
- Reliable protection: Enjoy peace of mind as the inside deadbolt lock and standard key lock add security to your home. Our storm doors also come with safety glass that breaks in small pieces to prevent your family from accidental injury.
- Energy efficient: Along with the added insulation, the bottom expander with vinyl sweep provides a weather-tight fit to help reduce your energy costs.
Available in Full-View, Operating, or Sliding Models.
Available in white, almond, or brown.
|
| Before |
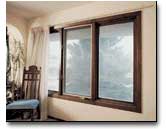 |
| After |
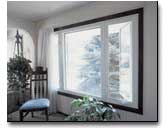 |
| |
Better Homes is dedicated to providing the very best product and service to homeowners nationwide. |
|
|
